Welcome to the ultimate guide to editing travel photos! In this comprehensive article, we will explore the best tips and tools that will help you transform your travel images into jaw-dropping masterpieces. Whether you’re a professional photographer or an enthusiastic traveler looking to enhance your vacation snapshots, this guide is here to assist you every step of the way. By the end of this article, you’ll have a solid understanding of the editing techniques and software available to take your travel photos to the next level. So grab your favorite cup of coffee and let’s dive in!
The Importance of Editing Travel Photos
Editing travel photos plays a crucial role in bringing out the essence and beauty of your captured moments. It allows you to enhance colors, adjust lighting, correct imperfections, and create a unique style that reflects your vision. With the right editing techniques, you can transform an ordinary snapshot into a stunning visual story that evokes emotions and captures the true essence of your travel experience.
The Ultimate Guide to Editing Travel Photos: Tips and Tools
Capturing the Perfect Shot
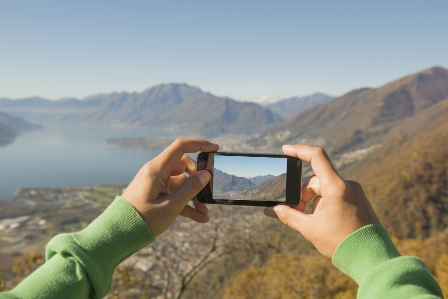
Before diving into the editing process, it’s important to start with a well-captured photo. Pay attention to composition, lighting, and framing to ensure you have a strong foundation to work with. Experiment with different angles and perspectives to add interest and depth to your images.
Selecting the Right Editing Software
To edit your travel photos effectively, you need reliable editing software. Adobe Lightroom and Adobe Photoshop are two popular choices among professional photographers and enthusiasts. Lightroom offers a wide range of tools specifically designed for editing and organizing photos, while Photoshop provides advanced editing capabilities for more intricate adjustments.
Understanding Basic Editing Techniques
To begin editing your travel photos, familiarize yourself with some essential techniques. These include adjusting exposure, contrast, saturation, and white balance. By mastering these fundamental adjustments, you can bring out the best in your images and create a visually appealing composition.
Enhancing Colors and Tones
Colors play a significant role in setting the mood and atmosphere of your travel photos. Experiment with color grading and tonal adjustments to enhance the vibrancy and richness of your images. Use the HSL (Hue, Saturation, and Luminance) sliders in Lightroom to fine-tune specific colors and achieve the desired effect.
Correcting Lens Distortions and Imperfections
Sometimes, lens distortions or unwanted objects may appear in your travel photos. Fortunately, editing software provides tools to correct these imperfections. Utilize the lens correction feature to fix distortions and the healing brush or clone stamp tool to remove unwanted elements from your images.
Applying Filters and Presets
Filters and presets can add a unique style and mood to your travel photos with just a few clicks. Light room offers a vast selection of presets created by professional photographers and editing enthusiasts. Experiment with different presets to find the ones that best complement your images and evoke the desired emotions.
Dodging and Burning
Dodging and burning are techniques used to selectively lighten or darken specific areas of an image. These techniques help create depth, emphasize details, and guide the viewer’s eye to the focal point. Use the adjustment brush tool in Lightroom or the dodge and burn tools in Photoshop to apply these techniques effectively.
Sharpening and Noise Reduction
To achieve crisp and clear travel photos, it’s essential to apply sharpening and noise reduction. Sharpening enhances details and adds clarity to your images, while noise reduction reduces grain and digital noise. Use these adjustments sparingly to maintain a natural and professional look.
Adding Creative Effects
For a more artistic touch, consider experimenting with creative effects. Adding vignettes, split toning, or textured overlays can enhance the overall mood and aesthetics of your travel photos. Be cautious not to overdo these effects, as subtlety often yields the most impactful results.
Saving and Exporting Your Edited Photos
Once you’re satisfied with your edits, it’s time to save and export your travel photos. Choose the appropriate file format (such as JPEG or TIFF) and adjust the image size and quality settings to suit your intended use. Consider creating separate folders or albums to keep your edited photos organized.
The Ultimate Guide to Editing Travel Photos: Tips and Tools for Jaw-Dropping Images (FAQs)
To make your travel photos stand out on social media, it’s essential to capture unique moments and apply eye-catching edits. Experiment with different editing styles, utilize presets, and pay attention to composition. Engage with the photography community and draw inspiration from other talented photographers. Remember, consistency and originality are key to creating an impactful online presence.
Absolutely! Many editing apps, such as Adobe Lightroom Mobile, VSCO, and Snapseed, offer powerful editing capabilities right at your fingertips. These apps allow you to adjust exposure, colors, and apply various effects to your travel photos. With the convenience of mobile editing, you can enhance your images while on the go.
Maintaining a consistent editing style is crucial for creating a cohesive portfolio of travel photos. Start by defining your preferred aesthetic, such as vibrant and colorful or moody and atmospheric. Develop your own presets or utilize existing ones that align with your vision. Regularly review and fine-tune your editing process to ensure consistency across your images.
Choosing the best editing software depends on your specific needs and level of expertise. Adobe Lightroom and Adobe Photoshop are industry-standard choices, offering a wide range of tools and capabilities. However, if you’re a beginner or prefer a more user-friendly interface, you may consider alternative options like Capture One, ON1 Photo RAW, or Luminar.
Conclusion
Congratulations! You’ve reached the end of the ultimate guide to editing travel photos. We’ve covered a wide range of tips and tools that will help you transform your travel images into jaw-dropping masterpieces. Remember, editing is an art form that allows you to bring your creative vision to life. With practice and experimentation, you’ll develop your unique editing style and create captivating visuals that leave a lasting impression. So grab your camera, explore the world, and let your editing journey begin!